If you’re planning a photography trip to Svalbard, one of the questions you might be asking is what clothing and camera gear to pack.
Recently I returned home after an epic adventure exploring Svalbard, and I thought it would be useful to share some tips on what to pack based on my experience. Hopefully my advice will help anyone else going on a similar trip.
In the weeks and months before I left, I spent a fair bit of time planning what camera equipment to take, and what clothing I’d need. Now I can look back on my experiences, there are some items that were essential and some I didn’t even take out of my bag.
If you want to read more about my adventures in Svalbard, the article is here.
Contents
Camera gear
Travelling to Svalbard is not like going to most other destinations, and the same applies for the camera gear needed. You’re in a remote location, limited on what you can pack and often operating in harsh conditions. Here are my tips on what kit to pack to make the most of your photography trip to Svalbard.
Camera
I took two camera bodies, and recommend that you do the same for a couple of reasons. Firstly, you have a spare in case something happens to your primary camera. Photographing in cold conditions, with sea spray or snow, is tough for a camera and you’re more likely to suffer a hardware failure in these harsh conditions. It’s not a cheap trip, and it would be a huge shame to miss out because your only camera broke early on in the trip.
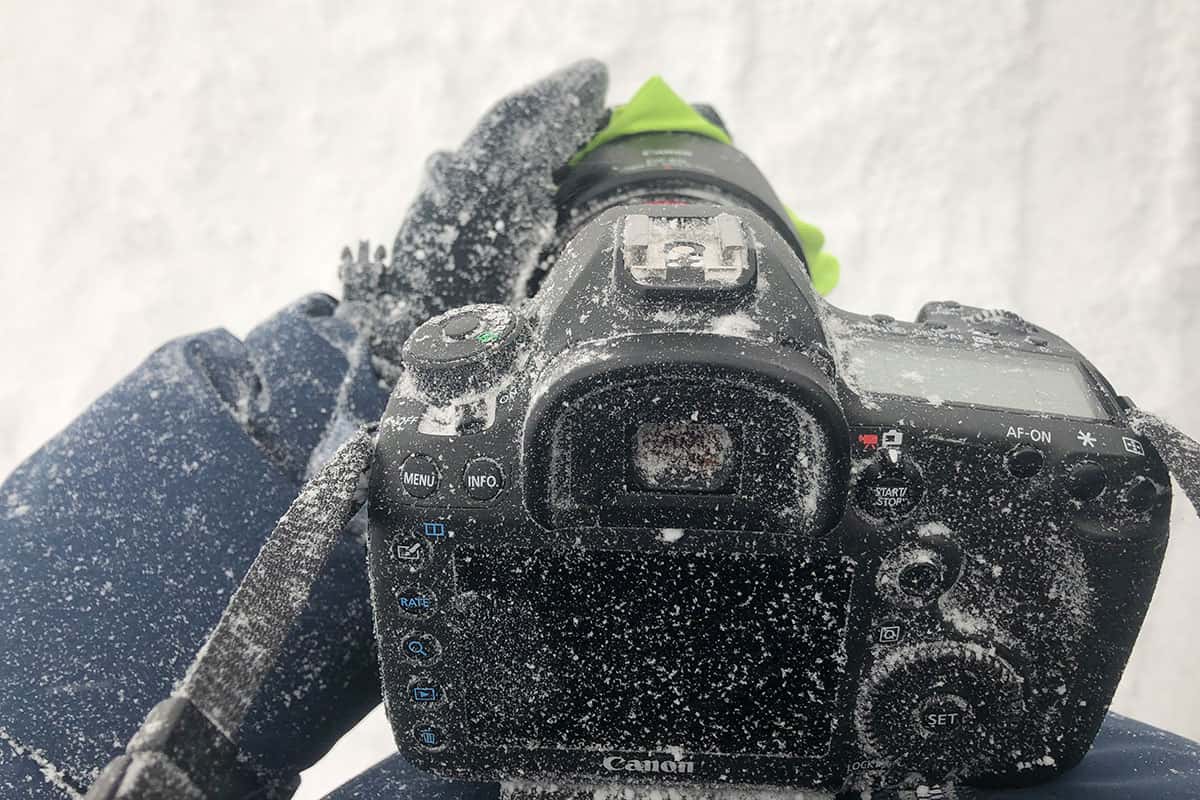
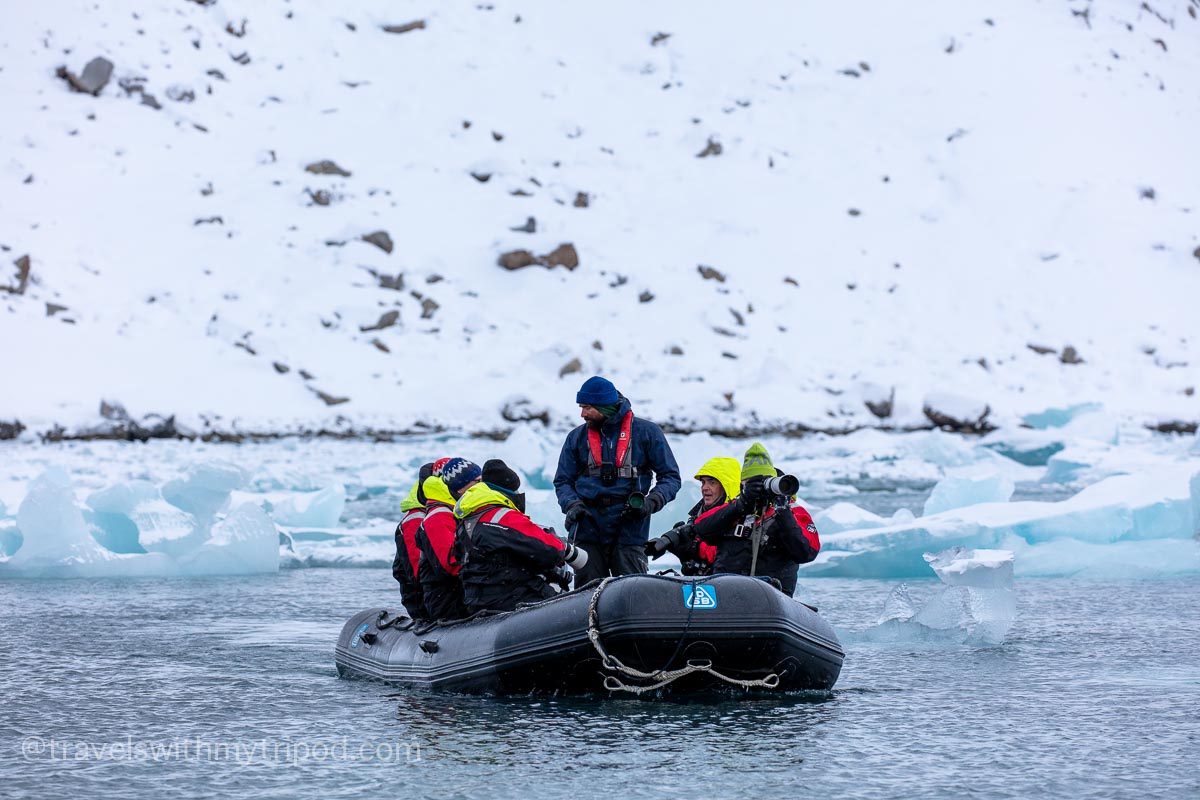
Secondly, it makes it much easier to use two lens combinations without having to change lenses. Quite often you’ll be on a small Zodiac with limited space, and this really isn’t an ideal place to be swapping lenses. The boat will be bobbing up and down, and you’ll also potentially be splashed by the waves – not ideal if you’re in the middle of changing a lens!
The best camera to take is one with high resolution, fast auto-focus (ideally with accurate animal eye tracking) and a high shooting rate. One with some degree of weather protection would be ideal too.
Something like the Canon R5, Sony A1 or Nikon Z8 would be perfect for this trip. However you don’t need a top-of the range camera to get great results. It’s more important that you are familiar with your camera and know how to operate it. The last thing you want is to miss the shot of a lifetime as you’re struggling to change a setting on an unfamiliar camera!
Lenses
I took a few lenses but only used two in the end. A lens in the 24-70mm range is ideal for landscape shots, and a longer telephoto for both landscape and wildlife. Zoom lenses are ideal, as often you or the subject is moving so a zoom allows you to easily reframe. I used the following two lenses.
Canon EF 100-400mm f4.5-5.6L IS II
I did take a wide-angle lens with me too, but there wasn’t any time I felt I needed to go wider than 24mm.
Image stabilisation is really useful, as quite often you’ll be on a Zodiac and hand-holding your camera when the boat is bobbing up and down.
Longer lenses would be useful for wildlife photos, but the downside is the size and weight. There isn’t much room in the Zodiac, and a 500mm prime or longer would be rather cumbersome.
I also took my 1.4x extender but didn’t ever feel I needed to use it. This was mostly as the occasions I probably could have made use of it were also the moments when it was least convenient to fit it.
Tripod and filters
I took a small travel tripod, monopod and my usual set of filters – more out of habit than thinking I’d use them, but they didn’t even leave my bag. My advice is to leave all that at home – you won’t be using it, and it just takes up valuable space and weight allowance.
Most of the time you’re shooting from the ship or the Zodiac, where the vibrations and movement mean a tripod is useless. When you’re on land you’re usually moving around so there’s little need for a tripod. The excursions to shore only happen during the day, so there is always enough light to shoot handheld.
A few people used monopods, but found they were more of a hinderance when on the ship due to the movement. I didn’t even bother taking mine out of my bag, and it spent the whole trip sitting next to my tripod.
Batteries
I took a few extra batteries, thinking battery life might be an issue due to the cold, however only rarely needed to replace them when out. Because we would only be away from the ship for a few hours at most, there was plenty of opportunity to charge batteries before the next excursion.
The cold weather can reduce battery life considerably though, so it’s definitely worth having at least one spare per camera body.
Typically, I’d swap batteries once we got back on the ship after the morning Zodiac excursion and put the used set on charge. These would then be ready to swap again after the afternoon trip.
Most of my batteries are original Canon items, but I have also recently purchased a set of K&F Concept LP-E6NH batteries which seem to work just as well as the originals.
Chargers
With so many different electrical devices to charge, over the years I’ve got fed up with having to pack several chargers, adapters and lots of cables. I decided this trip to try to make this as efficient as I could.
I ended up buying the UGreen 65W USB C multi-charger which is light and compact yet powerful enough to charge all my electronic gear. With 65W of power output and 4 ports, it charges my MacBook Air, DJI Mavic drone, iPhone and anything else that works from a USB-A or USB-C connection.
I also bought the K&F Concept Dual LCD charger to replace the standard Canon charger. This had two advantages; the first is that it charges two batteries at once, and the second is that it is powered by USB rather than mains, meaning I didn’t need an extra 3-pin socket.
All my chargers and cables fitted snuggly into a small cable tidy case, which kept everything neat and tidy.
Memory Cards
The amount of memory cards you need will depend on the size of images your camera produces and the number of shots you take. If your camera has a fast burst frame rate it’s likely you’ll take a lot of photos. I took over 4,500 images on my trip and others took a lot more.
I prefer to use several smaller cards rather than one big one – for example a number of 64GB cards instead of a single 256GB card. This way if I was unfortunate enough to have a card fail, then I’d only lose the images on that card rather than all of them. My card of choice is SanDisk Extreme Pro – I’ve been using them for many years now and have never had a single issue.
I also have a rule where I don’t format a card until the images are on the main hard drive of my computer at home, and backed up to at least one other location. This means making sure I have enough memory cards to last the whole trip.
I store all my cards in a protective case, which fits easily into one of the pockets in my camera bag.
Camera bag
I used my usual camera backpack to safely get my camera gear there, and packed a waterproof backpack in my main luggage along with a padded insert. Once I was on the ship, I put my two cameras with lenses into the waterproof bag, and used this for the rest of the trip.
I bought the 35L version of the Earth Pak Summit bag which was just the right size for 2 x DSLRs with lenses attached. I also bought the S-Zone padded camera insert which fitted inside perfectly. There was also enough spare room to also fit some items of clothing, which also helped add padding for protection. The padded insert was OK, but didn’t give the same level of protection as a dedicated camera bag.
I had thought about buying a large dry bag to put my normal camera backpack in, however this would have been too big and unwieldy when on the Zodiac.
This setup worked well, although most of the time I could probably have got away with a normal camera bag. There were a couple of trips though when we did get splashed a fair bit, and I was glad to have had the waterproof bag. It only takes a couple of waves to cover your bag in enough water to cause an issue so I’d definitely recommend it.
When picking a bag, bear in mind that space on the Zodiac is limited, especially if people are kneeling down to get a good view. A top-loading bag is useful here, as there isn’t really room to lay a normal backpack down to open it.
Also look for bags with decent straps – some of the cheaper versions didn’t have the best straps so weren’t as comfortable to wear. Fortunately, you won’t be walking far with it – most of the time we didn’t walk more than a few minutes away from the shore.
One final tip is make your bag stand out, either by adding something to it or picking a bright colour that no one else in the group has. When you’re sat in the Zodiac surrounded by several bags that all look exactly the same, it’s hard to know which is yours. By making yours stand out, you won’t have that problem.
Laptop and storage
For editing and backing up my images I took my MacBook Air. I’ve got the lowest spec model with the M1 chip, and even though it only has 8GB of RAM is powerful enough to edit 50MP RAW files. This model offers a good compromise between size and performance, and is small and light enough to fit in a small carry-on bag.
I also use an external storage drive – I’ve used a Samsung T7 for a few years now and these offer great performance for a decent price. Currently I have a 1TB drive which is more than big enough to backup all my images onto.
There was plenty of spare time on the ship, so I spent that doing some initial sorting of images and started editing a few images. You can see some of my favourites in my article.
Drone
Most tour operators in the Arctic don’t allow recreational drone flights, so flying my drone was not allowed. I didn’t really miss it though, as most of the photo opportunities were more suited to a normal camera.
Clothing
In our pre-departure notes from Polar Quest, they had given some advice on what clothing to wear. I was also pretty familiar with the expected weather from previous trips to Norway and Iceland during the winter so knew roughly what to expect.
My visit to Svalbard was in September, and winter was approaching. However despite the close proximity to the North Pole, Svalbard is relatively warm compared to other places at the same latitude thanks to the Gulf Stream. During my trip, temperatures were just below 0 degrees C, with a windchill of around -10 at times.
Base layers
The key to dressing for cold weather is layers. Several thin layers of clothing are better than one thick layer as they give you flexibility to dress depending on what you’re doing and the conditions.
On a typical day I wore a merino wool base layer. I’ve tried cheaper base layers before, but for this trip decided to invest in a set of Smartwool Merino wool top and leggings . If you want the best in comfort and warmth then I’d definitely recommend them, even though they aren’t the cheapest option.
On colder days, I wore slightly thicker Rab Power Stretch Polartec leggings which were fantastic.
I also wore a thin fleece on top.
Wool sweater
A good quality wool sweater is really effective at keeping you warm. I’d taken one with me that I had purchased in Iceland, but I also bought a new one at one of the outdoor stores in Longyearbyen. Most locals wear something similar, for good reason – they are really warm!
If you ever visit Norway or Iceland, make sure you keep enough space free in your luggage so you can buy one of their wool jumpers.
Trousers
I wore a pair of Montane Super Terra Pants which were great. They are made from quite thick material, however aren’t insulated so I always wore these over my thermal leggings. If we were going ashore and wouldn’t be wearing the big insulated suits, I’d put a pair of waterproof Gore-Tex outer trousers over them. On previous trips to cold destinations I’ve worn ski trousers, and while these are warm they are rather bulky.
Winter jacket
I ended up taking a medium thickness down jacket (the Rab Infinity Alpine Down Jacket) which was ideal. You don’t want anything too bulky as it needs to fit under the immersion suits that are provided for when you’re out on the Zodiacs.
I also took a waterproof jacket to wear over my down jacket, which gave added protection.
Gloves and hats
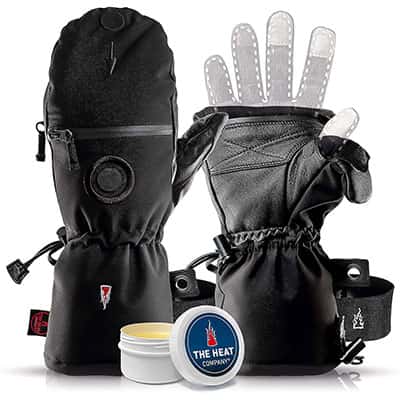
Warm gloves are essential, but you also need to be able to operate your camera. I wore some fleece windproof gloves, with Heat Company outer mittens over the top when it was cold. These work really well as not only do they keep your hands warm, you can flip the mitten and thumb section back so you can use your camera without having to remove the mitten.
A warm hat was essential, and a snood or balaclava was also really useful too – especially when it was windy.
Footwear
I have four words to say about the best footwear for this trip – Muck Boots Arctic Sport. Almost everyone on the trip had a pair, and they were fantastic – highly recommended! You need to wear knee high boots when on the Zodiacs, and the Arctic Sport was perfect for these conditions. The insulation worked really well to keep my feet warm all day, and the boots were perfectly comfortable even when walking for several miles across rough ground.
I packed my boots in my luggage but as they’re rather quite bulky, they took up a fair bit of room. One tip I have is to stuff them with other items of clothing to make use of the space inside.
When on the ship I wore trainers, although slippers would have been fine too. I also took a pair of winter hiking boots, which I wore while travelling to Svalbard, however once there I didn’t really wear them much. In hindsight, I would have just worn my trainers while travelling, with the Muck Boots in my luggage.
Interesting fact: In Svalbard, it is tradition to remove your shoes when going inside. Many restaurants, hotels and museums have shoe racks inside the entrance where you can leave your outdoor shoes.
Socks
I took a few pairs of thick wool socks as well as a wool inner sole for my boots which I purchased from one of the shops in Longyearbyen.
Ice Spikes/Crampons
I’m a big fan of the ice spikes you fit to your shoes when visiting cold countries – they’ve been invaluable for my trips to Iceland and Norway for example. However I didn’t take them to Svalbard, and didn’t feel I needed them. You definitely won’t be using them when on the ship, and there weren’t any moments where they were required even when on land.
Other accessories
Seasickness tablets
If you’re not a seasoned seafarer then it’s probably worth taking sea or motion sickness tablets. I took a couple of packets of Stugeron, and others on the trip used Kwells. Both seemed to be effective, and I didn’t feel ill even though we had some reasonably rough seas at times.
I also bought some motion sickness wristbands which I used a couple of times, however it’s hard to know if these were effective in addition to the tablets. For the same of a few pounds though, it’s worth getting a pack just for the additional peace of mind.

Wow, thank you so much for this guide, I am just starting to plan a trip to Svalbard for the fall and you have answered so many of my questions. Thank you for covering so much, so thoughtfully.
Thanks for your comments. I’m glad you found my article useful and I hope you have a great time in Svalbard!
Excellent report. Heading there this spring anmd was considering what camera gear to bring …. thanks.